Smoking
Cold Smoking at Home: A Beginner's Guide to Curing and Smoking Salmon
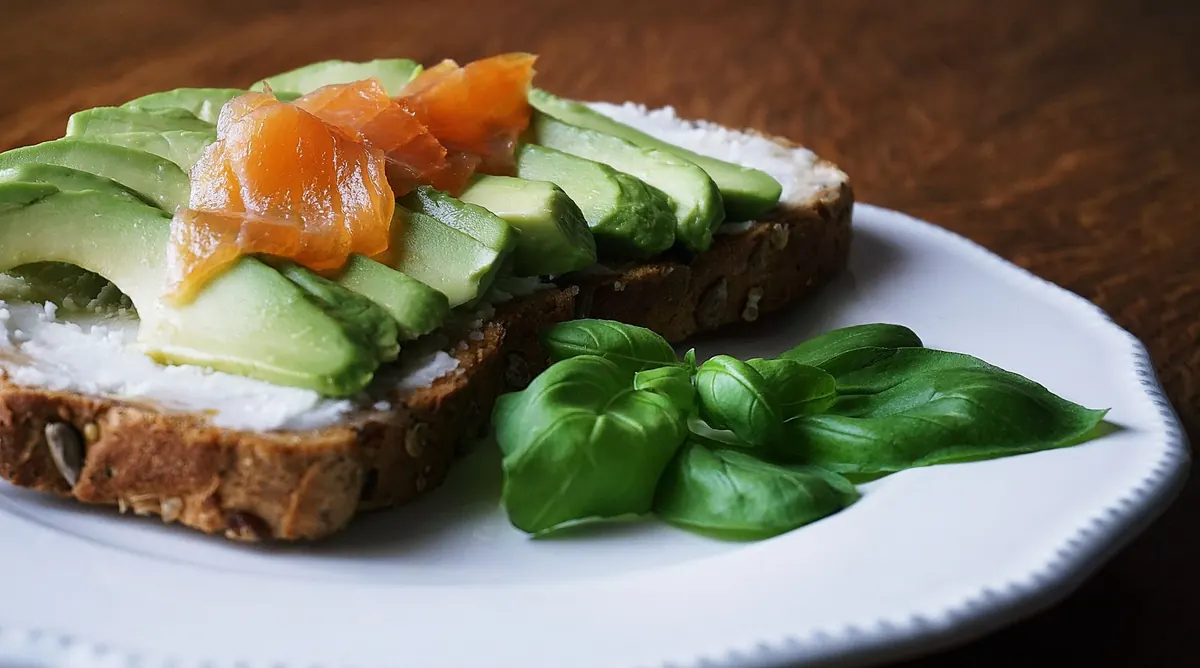
Cold smoking is the opposite of a quick cook. Nothing sizzles, nothing chars, and if you get it right the fish never gets warmer than a cool cellar. What you end up with is a side of salmon with a silky texture, amber edges and a real smoke flavour — nothing like the pale, watery slices in a supermarket packet. It is one of the most rewarding things you can do at home with a barbecue, and it needs no more than a fridge, some salt, some sugar and a reliable way of making smoke.
Hot smoking and cold smoking are not the same job
Hot smoking is cooking. You run the smoker at roughly 80–120°C, the fish firms and flakes, and it's ready to eat hot from the grate. Cold smoking is curing with flavour attached. The temperature stays below 30°C — ideally somewhere between 15°C and 25°C — so the fish never cooks. The texture stays dense and sliceable, and the salt and sugar do the preserving work.
That difference explains the single most important rule for beginners: cold smoking is a two-stage process. Cure first, smoke second. A raw fillet left in a cold smoker for ten hours is just raw fish with a smoky smell. The cure is what firms the flesh, draws out moisture and makes the whole thing safe and pleasant to eat.
What you need before the fish arrives
Line everything up first. Cold smoking is slow and mostly hands-off, but it goes wrong when people improvise halfway through.
- A thick salmon fillet or side, skin on, pin-boned. Freshness matters more here than anywhere else in barbecue cooking. A kilo is a good beginner's size — big enough to slice, small enough not to waste if it goes wrong.
- Coarse sea salt and light brown sugar, in roughly a 60:40 ratio by weight. Fine table salt makes the cure too intense and uneven.
- Flavour extras: cracked black pepper, dill, lemon zest, crushed juniper. Keep it to two or three.
- A shallow dish, cling film and a weight — a couple of tins do nicely.
- A wire rack and kitchen paper for drying.
- A cold smoke generator. A maze-style generator or a small tube smoker, filled with fine wood dust rather than chips; chips burn hot and bitter. Oak, apple, beech and alder all work well. Avoid resinous softwoods.
- A barbecue or kettle with a lid that can hold the generator below the fish, plus a probe thermometer and a fridge thermometer.
- Ice packs for warm days.
The cure: salt, sugar and patience
For a 1kg fillet, mix 200g coarse sea salt with 130g light brown sugar and any aromatics. Spread half in the bottom of the dish, lay the salmon on top and pack the rest over the flesh. Cover with cling film, weight it down and put it in the fridge.
How long?
Thickness decides the time, not weight. A thin tail end might be done in 12 hours; a thick loin needs 18–24. Turn the fillet once, halfway through, and pour off the liquid that collects — that brine is exactly what you want to see.
You're looking for flesh that feels firm and slightly springy, like a well-set jelly, and looks darker and glossier at the edges. If the middle still feels soft, give it more time. Cut a thin slice from the thickest part and taste it: it should be seasoned all the way through, not just on the surface.
A note on curing salts: sodium nitrite blends such as Cure #1 are used for products meant to keep for weeks. For a batch you'll eat within a week, a plain salt-and-sugar cure kept cold is the simpler route. If you do use a curing salt, follow the supplier's ratio exactly and never swap it one-for-one with ordinary salt.
Rinsing, drying and the pellicle
Rinse the fillet briefly under cold running water to take off the surface cure, then pat it dry and sit it on a rack in the fridge, uncovered, for 12–24 hours. The surface will turn from wet to tacky and slightly glossy. That's the pellicle, and it's the layer smoke actually clings to. Skip this step and most of your smoke ends up in the air.
The cold smoke itself
Set the generator going, put the fish on a rack above it, and close the lid with the vents open a crack. You want a thin, steady wisp drifting across the fish, not a thick fog trapped inside. Dense smoke tastes ashy and bitter, and it's the most common beginner's mistake. Eight to twelve hours at under 25°C gives good depth; the fish should stay cool to the touch throughout.
If the weather is warm, work overnight, or set a tray of ice under the fish rack and swap it every couple of hours. Above about 30°C you're drifting into hot smoking territory without the heat control that makes hot smoking safe.
At the eight-hour mark, cut a sliver from the edge and taste it. Under-smoked salmon is pleasant; over-smoked salmon is not, and you can't take smoke back out. Once it's done, wrap the fillet and rest it in the fridge for 24 hours — the flavour evens out and softens noticeably.
Slicing, storing and eating
Use a long, thin, sharp knife and slice thinly on a shallow angle, away from your body, leaving the skin behind. Serve it on rye bread, folded through scrambled eggs, or with a squeeze of lemon and a few capers.
Home-cured cold-smoked salmon is a perishable product. Keep it wrapped in parchment in the coldest part of the fridge and eat it within three to five days, or freeze slices interleaved with parchment for a few months. Cold-smoked fish isn't cooked through, so it isn't the thing to serve to anyone pregnant, very young, elderly or with a weakened immune system — if you're unsure, ask a health professional.
Your first batch, start to finish
- Buy 1kg of the freshest skin-on salmon you can find and pin-bone it.
- Mix 200g coarse salt with 130g light brown sugar and any flavourings.
- Cure in the fridge for 12–24 hours under a weight, turning once.
- Rinse, dry, and rest uncovered on a rack for 12–24 hours.
- Cold smoke for 8–12 hours, below 25°C, in a thin wisp.
- Rest 24 hours, slice thinly, and eat within a few days.
Start with one fillet, write down your cure time, smoke time and temperatures, and adjust from there. The second batch is always better than the first.
Photo: Suzy Hazelwood / Pexels